How To Remove The Drain From The Bathtub

Your bathtub drain has probably been living rent-free in your head ever since it started looking gross, acting weird, or refusing to hold water. Maybe it’s clogged, rusty, or...

Your bathtub drain has probably been living rent-free in your head ever since it started looking gross, acting weird, or refusing to hold water. Maybe it’s clogged, rusty, or just plain ugly. Either way, removing it is a very doable DIY job—no plumbing degree required.
Before you grab a hammer and go full demolition mode, take a breath. Most bathtub drains come out with a few simple tools and a little patience. The trick is knowing which type you have.
Step 1: Identify Your Drain’s Personality
Bathtub drains are like houseguests. Some pop up politely. Some need to be twisted. Some hide behind a lever and make you work for it.
Must Read
Look at your drain and play detective. The shape of the stopper tells you almost everything.
Pop-Up Stopper
This is the classic drain with a little knob or flat lid on top. It usually pops up when you flip a lever or pull a knob. Some pop-ups unscrew by hand, while others hide a tiny screw under a cap.
If it spins freely, it might just need a gentle twist counterclockwise. If it has a set screw, unscrew that little rascal and lift the stopper out.
Toe-Touch Drain
You know this one: push it down to close, push it again to open. It’s fancy in a low-key way. To remove it, push it down, then twist the stopper counterclockwise.
Sometimes it unscrews easily. Sometimes it laughs at you and spins forever. If that happens, hold the flange steady and try again with a rag for grip.
Trip Lever Drain
This type has a lever on the overflow plate—the metal circle on the tub wall above the drain. Remove the screws holding that plate. Then pull the plate and linkage out gently.
Once the linkage is free, the stopper often lifts right out of the drain. It’s a bit like pulling a secret lever in a movie. Except the treasure is a clean drain.
Grid or Strainer Drain
This is the simple metal grate that sits over the drain. It usually has two screws. Remove those screws, and the grate lifts off.
No twisting, no drama. Just keep the screws somewhere safe so they don’t vanish into the void.
Step 2: Gather Your Tools (and Snacks)
You don’t need a truckload of equipment. A screwdriver, adjustable pliers, a rag, a bucket, and a flashlight will handle most stopper removals.
 How To Remove Bathtub Drain Plug
If you’re removing the actual drain flange, grab a tub drain wrench. It’s a cheap tool that saves your knuckles and your sanity. Penetrating oil is also handy for stubborn, rusty drains.
And yes, a snack is a tool. Emotional support counts.
Safety Stuff That’s Actually Useful
Turn off the water if you’re replacing pipes. Put a bucket under the drain if you have access below. And protect your tub with a towel so dropped tools don’t chip the enamel.
Also, wear eye protection when prying or using oil. A tiny rust flake in the eye is not the spa experience you want.
Step 3: Remove the Stopper
Start by clearing the tub. Remove any hair catcher, toys, or mysterious shampoo bottles. If the drain is clogged, you might want to scoop out the gunk first. Wear gloves. Future you will be grateful.
For a pop-up stopper, lift it, twist it, or unscrew the set screw. For a toe-touch, push down and twist counterclockwise. For a trip lever, remove the overflow plate and pull the linkage.
For a grid drain, unscrew the grate. Boom—you’re already done with the easy part.
Step 4: Remove the Actual Drain Flange
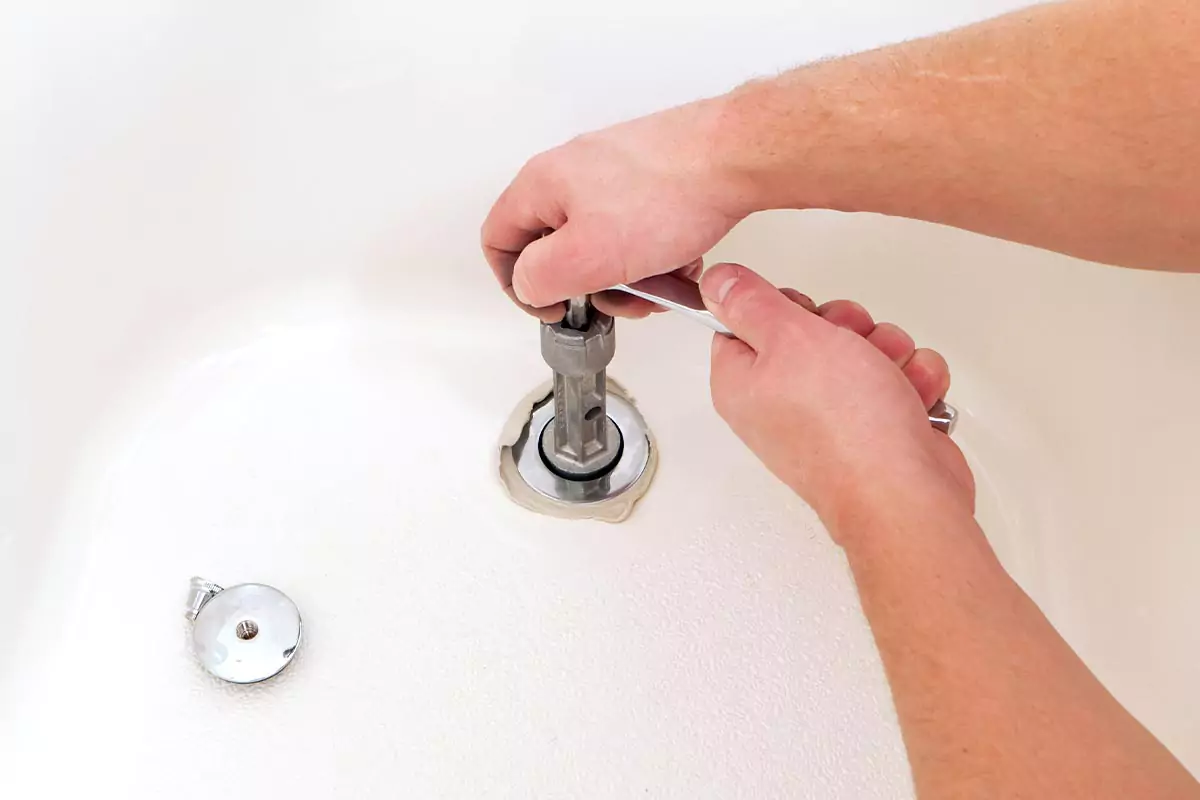
If you’re replacing the whole drain assembly, the stopper was just the opening act. Now you need to remove the flange—the metal ring screwed into the pipe below.
Look down into the drain. You’ll see the flange threaded into the shoe piece. It unscrews counterclockwise. This is where the tub drain wrench earns its keep.
Insert the tool, apply steady pressure, and turn lefty-loosey. If it doesn’t budge, don’t turn into a superhero. Add penetrating oil, wait a bit, and try again.
 How To Replace Bath Waste Pipe
Step 5: Handle Stubborn Drains Like a Zen Master
Some drains are sealed with plumber’s putty, silicone, or decades of spite. They can be stubborn. Try a rag and pliers for extra grip, but go gently.
A hair dryer can warm up old putty and help it release. Just don’t melt your tub. If you have access below, you can also hold the pipe steady while you twist from above.
If it still won’t move, stop before you crack the tub. Call a plumber. That’s not defeat; that’s wisdom.
Common Mistakes to Avoid
Don’t force the drain with giant pliers unless you enjoy scratched porcelain. Don’t lose the overflow plate screws in the drain; they are tiny and vengeful.
Don’t overtighten the new drain. More force does not equal more better. And don’t forget to remove the rag from the pipe before you test the water.
Step 6: Clean, Replace, Repeat (If Needed)
Once the drain is out, clean the threads and scrape away old putty or silicone. Stuff a rag into the open pipe to keep sewer gas from saying hello. If you’re installing a new drain, follow the manufacturer’s instructions and don’t overtighten.
Run water and check for leaks. If you see drips, tighten slightly or reseal. A tiny leak now is way better than a ceiling stain later.
How to Know You’re Done
You’re done when the old drain is out, the threads are clean, and your tub isn’t leaking. If you’re just replacing the stopper, done means it lifts out and a new one fits.
Take a photo before you disassemble anything. Your future self will forget which little piece went where.
You’ve Got This
Removing a bathtub drain is one of those tasks that feels mysterious until you actually try it. With the right tool and a calm approach, you can banish that grimy, rusty, annoying drain for good.
And when it finally pops out, take a victory lap. You just defeated a tiny plumbing dragon. Now go enjoy your tub—maybe with bubbles, definitely with pride.
